Today I will teach you how to paint a wooden box through this simple and nice blog. It is about customizing a wooden box through the paint and felt, so that the result is something totally unique and decorative. You can use this box as a jeweler, for example, or apply the technique to decorate larger ones to which you want to give another use. The idea already has it, now it has to put into practice, as you like. Let’s get down to business!
The materials needed to paint your wooden box
Thus, to make this DIY and paint a wooden box you will need the following materials …
- A box of natural wood, untreated
- Putty for wood
- A thin wooden board
- Acrylic paint of varied colors
- Glue
- Felt
- Sandpaper
- Saw
- Tape measure
- Screwdriver
- Paint brush
- Masking tape
- Pencil
Instructions
First, remove the latch that carries the box and use putty to fill any imperfection and holes left, since in this case have not screwed it again. Also remove the hinges because this way you will work more comfortably, although these holes do not cover them since in this case we will put them back.

Paint the box
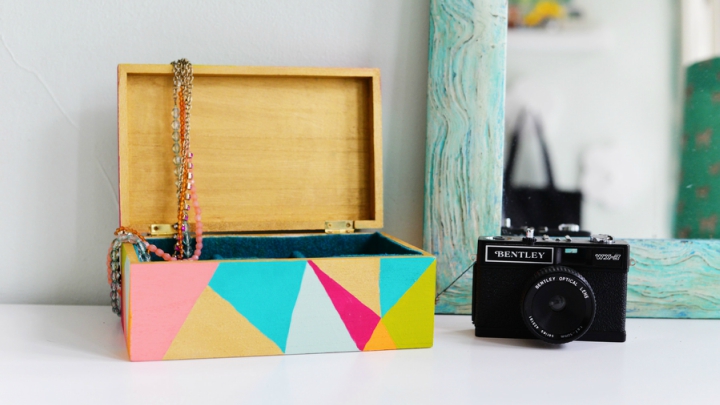
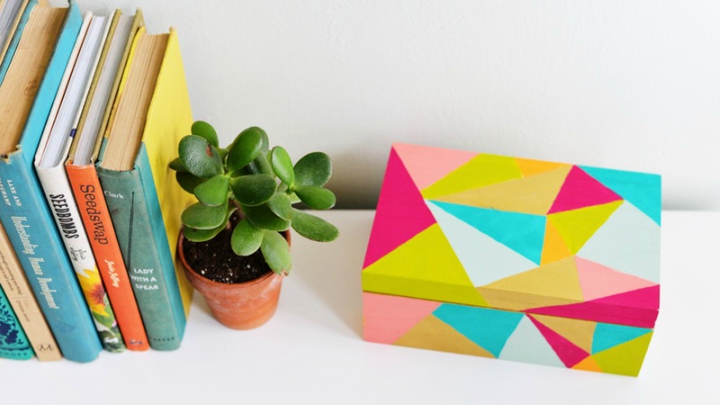
With the box dismantled, place bodybuilder tape to create the pattern you would like the design to carry. Here they have used a geometric print. The sides and the interior have been painted in a dark golden color, without stamping. Use paint suitable for wood and apply according to the manufacturer’s instructions.
You may also like to read another article on RealOrigin: How to make a wooden side table
The compartments
As the box dries, let’s create some interior compartments so your jewelry is always tidy. Make it cut sections of the thin wood board and then cover the inside of the box with felt, gluing it with glue. The small tables that serve to divide the space you can line them of individual way and later to glue them already lined; Calculate the size well by cutting them because the felt of the bottom and that of the boards will make you lose a few millimeters.
Finally, re-screw the hinges and you will have ready your personalized jeweler, with your painted wooden box and its internal organization so that everything is in order.
Tips for painting wooden boxes
This craft that we have seen is an example of how you can paint a wooden box to personalize it and create a nice jeweler. Before putting it to work, it is good that you sand the box to prepare the surface, and remove the dust generated before you paint or there will be specks attached to the paint.
When finished, you can apply a layer of varnish to protect it. Make it colorless so it does not alter the intensity of the paint.
Paint a box with pickled effect
Another way to paint wooden boxes is by applying a pickled effect. It looks great in fruit boxes, for example, for vintage decor.
First paint the wood of a dark color so that the white highlights more. You can do it with nogalina, which is a dark coloring. Then, with a brush or with steel wool, wax stain the areas of the box in which you do not want the paint to be fixed.
Then paint the box with white acrylic paint. You can give it two coats. Finally, pass the sandpaper through the box, and when you pass through where you left the wax stains the paint will jump easily and give that pickling effect that we are looking for. You can do this with the colors you prefer.