

Dark wood stain can look flat in Portland, OR, because moisture, weak light, surface preparation, and uneven absorption reduce visible depth. Portland receives about 88% of its annual rainfall from October through May, while cloudy conditions remain common. Therefore, understanding how to darken paint shades helps explain color theory, but stain requires different preparation and application techniques.
Key Takeaways
- Moisture often prevents dark stain from developing a rich, even appearance.
- Heavy pigment can hide grain instead of creating deeper-looking wood.
- Uneven sanding changes how individual boards absorb dark stain.
- Cloudy Portland light can make deep brown finishes appear visually dull.
- Testing stain on the actual wood remains the safest color decision.
- Proper drying, preparation, and topcoat selection can restore visual depth.
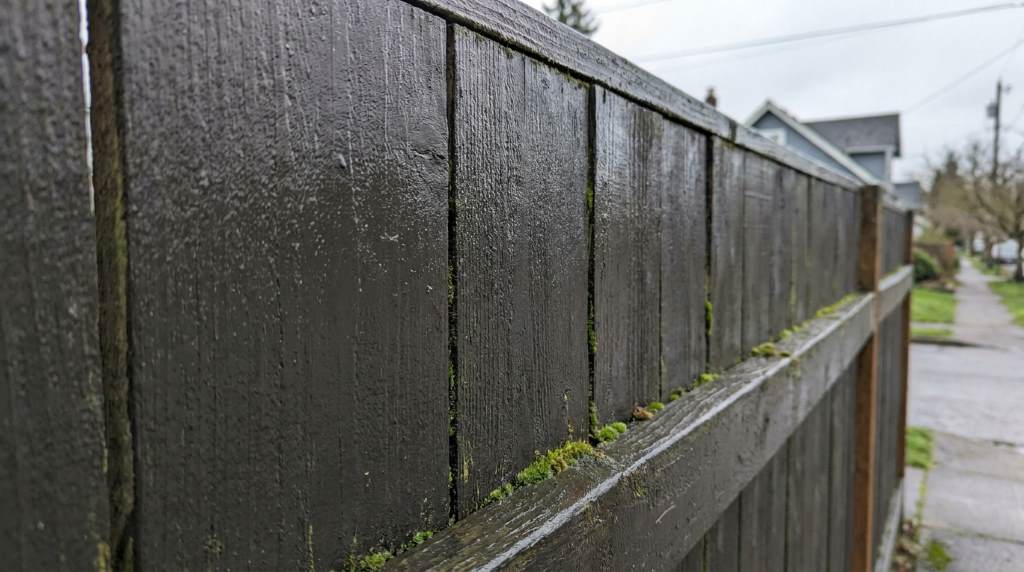
Moisture Can Flatten Dark Stain Before It Fully Develops
Moisture ranks among the most important reasons dark stain loses visual richness in Portland. Wood continuously exchanges moisture with surrounding air, so local humidity can influence its condition.
Oregon State University Extension explains that wood gains and loses moisture according to surrounding relative humidity. Therefore, damp wood can behave differently during staining than properly conditioned wood.
Portland’s wet season creates an especially important timing issue for exterior projects. Consequently, staining wood after several damp days can produce inconsistent absorption across boards.
Before staining, inspect the wood carefully for dampness, condensation, or recent rainfall. Then allow adequate drying time according to the stain manufacturer’s requirements.
A moisture meter provides a more reliable check than simply touching the surface. If readings remain high, postpone staining until the wood reaches a suitable moisture condition.
Also consider covered areas that receive less airflow than exposed sections. Those locations can retain moisture longer and create noticeably different stain absorption.
For exterior projects, protect freshly prepared wood from rain while allowing air movement around the surface. This approach helps create more consistent conditions before application.
Portland’s weather also makes seasonal timing important for finish work. Whenever possible, choose a stable, dry weather window rather than staining immediately before wet conditions.
Surface Preparation Controls How Dark Stain Reflects Light
Dark stain cannot compensate for inconsistent sanding, mill glaze, old finish, or embedded contamination. Instead, those surface conditions create different absorption rates across the same project.
Start by identifying the wood species and existing finish before choosing a preparation method. Dense species often absorb stain differently from softer, more porous woods.
Use consistent sanding pressure across every board or section. Otherwise, heavily sanded areas may absorb stain differently from areas with compressed or uneven fibers.
Sand progressively instead of jumping between dramatically different grits. Then remove all sanding dust before applying the stain.
For additional exterior project context, consider these aluminum versus copper choices when coordinating wood finishes with surrounding exterior materials.
Pay special attention to end grain because it absorbs liquids much faster than broad wood faces. Applying stain carefully around those areas can reduce excessive darkness.
Previously finished wood creates another challenge because old coatings can block stain penetration. In that situation, remove incompatible coatings rather than simply adding another dark layer.
Also avoid polishing the wood excessively during final sanding. Extremely smooth surfaces can reduce absorption and make some stains appear lighter or less dimensional.
Signs That Preparation Caused the Problem
Look for sharp color differences between adjacent boards after the first coat. Those differences often indicate inconsistent absorption rather than an incorrect stain color.
Watch for pale patches, dark edges, streaks, and areas that appear almost painted. Each symptom can point toward a different preparation or application problem.
If the stain looks uneven immediately, stop before applying additional coats. Extra pigment rarely fixes an absorption problem and may instead create a heavy, opaque finish.
Too Much Pigment Can Make Dark Wood Look Less Dimensional
Dark stain does not automatically create greater visual depth. In fact, excessive pigment can cover natural grain and make wood resemble a flat painted surface.
Choose a stain that balances color strength with grain visibility. A transparent or semi-transparent formula may preserve more character than an extremely pigmented product.
When selecting products, compare samples under several lighting conditions. A finish that looks rich indoors can appear surprisingly muted beneath Portland’s overcast daylight.
Also avoid judging the final color immediately after application. Many stains change appearance as solvents evaporate and the finish reaches its intended cured condition.
Apply thin, controlled coats instead of flooding the surface with product. Follow the manufacturer’s wiping and penetration instructions because excess stain can create muddy-looking areas.
Keep your application method consistent from start to finish. Changing brush pressure, wiping time, or product quantity can produce visible differences between sections.
For larger surfaces, divide the work into manageable sections and maintain a wet edge. This method reduces lap marks and helps preserve a uniform appearance.
When a first coat looks slightly lighter than expected, resist the urge to add another coat immediately. Allow complete drying first, then evaluate the color under the intended lighting.
Portland’s Cloudy Light Changes How Dark Stain Appears
Light strongly affects perceived color, especially with dark wood finishes. Portland’s climate makes this factor particularly important because cloudy days occur frequently throughout the year.
National Weather Service climate records show Portland averages 223 cloudy days annually based on long-term observations. Consequently, exterior wood often receives softer, lower-contrast daylight.
Under diffuse light, dark brown surfaces can lose highlights that normally reveal grain variation. The stain remains dark, but your eyes perceive fewer tonal differences across the surface.
Try viewing a stained sample during morning, midday, and evening conditions. Then compare it under direct sunlight and the shade where the finished wood will actually sit.
Interior wood creates another lighting challenge because warm bulbs can shift brown tones toward red or orange. Cooler bulbs can make the same stain appear grayer or more neutral.
For this reason, never choose a dark stain from a tiny catalog chip alone. Instead, create a generous sample using the same wood species and preparation process.
Place the sample near the finished location before making your final decision. This simple test reveals how surrounding walls, flooring, landscaping, and natural light influence the color.
If the existing stain looks flat but remains structurally sound, consider whether lighting causes the problem. Sometimes improving nearby illumination produces greater visual improvement than applying more stain.
Wood Species and Grain Pattern Affect Dark Stain Depth
Different woods absorb stain differently because their density, grain structure, and natural color vary. Therefore, the same stain rarely looks identical across different species.
Open-grained wood can display stronger variation because porous areas accept more pigment. Dense sections may absorb less product and appear comparatively lighter.
Natural wood color also affects the finished shade. A warm underlying tone can push brown stain toward richer red or amber results.
Meanwhile, pale wood can produce a cleaner brown appearance but may show less contrast after staining. Always test your chosen product on the actual boards.
End grain deserves separate attention because it can become significantly darker than surrounding surfaces. Apply stain carefully and remove excess product according to the manufacturer’s instructions.
Some woods also contain natural oils that interfere with absorption or drying. When working with such species, follow product-specific preparation recommendations rather than relying on generic sanding alone.
Grain orientation matters as well. Quarter-sawn, plain-sawn, and rift-sawn boards can produce noticeably different visual patterns under the same stain.
Ultimately, the wood itself becomes part of the final color formula. Treat stain selection as a combination of product choice, substrate, preparation, and lighting.
How to Fix a Dark Wood Stain That Looks Flat
Start by determining whether the problem comes from color, absorption, lighting, or surface condition. Avoid changing several variables simultaneously because you may lose track of what actually improved the finish.
Use this troubleshooting sequence:
- Check moisture: Confirm that the wood meets the product’s recommended moisture condition.
- Inspect preparation: Look for uneven sanding, residue, old coatings, or contamination.
- Evaluate pigment: Determine whether excessive color hides the natural grain.
- Test lighting: Compare the finish under natural and artificial light.
- Test another coat: Apply it only after the first coat fully dries.
- Consider stripping: Remove the finish when incompatible layers cause persistent problems.
If the surface looks muddy because of excessive pigment, another dark coat usually makes matters worse. Instead, consider whether controlled removal or refinishing can restore grain definition.
If the color looks dull only in certain locations, compare those areas with a controlled sample. This comparison can reveal whether lighting rather than stain chemistry causes the perceived problem.
For exterior projects, remember that Portland’s building requirements emphasize maintaining exterior wood against weather exposure and deterioration.
That means appearance should never become the only priority. A durable finish must also protect the wood from moisture, weathering, and long-term deterioration.
When to Recoat Instead of Starting Over
Recoat only when the existing finish remains compatible, stable, and sufficiently uniform. Otherwise, additional product can amplify every underlying defect.
A second coat may deepen color when the first coat looks evenly distributed but simply lacks intensity. Always follow the manufacturer’s required drying and recoating interval.
However, avoid recoating surfaces that show peeling, severe blotching, contamination, or obvious adhesion problems. Those conditions usually require more substantial preparation.
Before committing to the entire surface, perform a small test area. Let that section dry completely and inspect it under the same lighting conditions.
If the test produces the desired depth, continue using exactly the same preparation and application technique. Consistency matters more than speed during dark stain projects.
Also remember that wood continues responding to its environment after finishing. Moisture changes can contribute to movement, which may affect long-term appearance and coating performance.
For broader home-planning considerations, these ways to add space can help coordinate renovation priorities before refinishing surrounding surfaces.
How to Prevent Flat-Looking Dark Stain in Portland
Prevention begins before you open the stain container. Select the wood, finish, timing, and application method as one connected system.
First, choose a stable weather window with sufficient drying time. Then protect the prepared wood from unexpected rain and condensation during the finishing process.
Next, prepare a large sample from the actual wood. Include the same sanding schedule, stain quantity, wiping time, and topcoat planned for the final project.
Evaluate the sample under realistic conditions rather than showroom lighting. Check it against nearby materials because surrounding colors can change perceived depth.
Keep application records for larger projects. Note the product, coat count, sanding sequence, drying intervals, and environmental conditions.
These notes become valuable when matching additional boards or repairing a section later. They also help identify mistakes if the finished appearance changes unexpectedly.
Finally, protect the finished surface according to the coating manufacturer’s recommendations. A suitable protective finish can help preserve color while reducing weather-related deterioration.
Remember that no stain can permanently prevent natural wood movement. Proper design, drainage, maintenance, and exposure control remain essential for exterior wood.
Conclusion: Restore Depth Without Making the Finish Heavier
Dark wood stain looks flat in Portland when moisture, preparation, pigment, wood characteristics, or lighting suppresses visible grain contrast. The best solution starts with identifying the actual cause rather than automatically adding another dark coat.
Test the wood, control moisture, prepare the surface consistently, and evaluate samples under realistic Portland lighting. If your existing finish already looks uneven, consider professional refinishing before applying additional product.
Take time to test before committing to the entire surface, especially with expensive hardwood or large exterior projects. A careful sample can prevent costly stripping, sanding, and refinishing later.
Ready to improve your dark wood finish? Start with a controlled sample, document the preparation process, and choose your final coating only after the test reaches its cured appearance.
Frequently Asked Questions
Why does dark stain look dull on my wood?
Dark stain can look dull when excessive pigment hides grain, moisture affects absorption, or low-contrast lighting reduces visible highlights.
Does Portland weather affect wood staining?
Yes, Portland’s frequent moisture and wet-season conditions can affect wood moisture and staining consistency.
Should I apply another coat to darken flat stain?
Only apply another coat after confirming that the first coat dried evenly and the product permits recoating.
Can sanding make dark stain look more even?
Yes, consistent sanding can improve absorption, provided you use an appropriate sanding sequence for the wood and finish.
How can I test dark stain before using it?
Apply it to a sample from the actual wood and evaluate the cured finish under the project’s real lighting conditions.