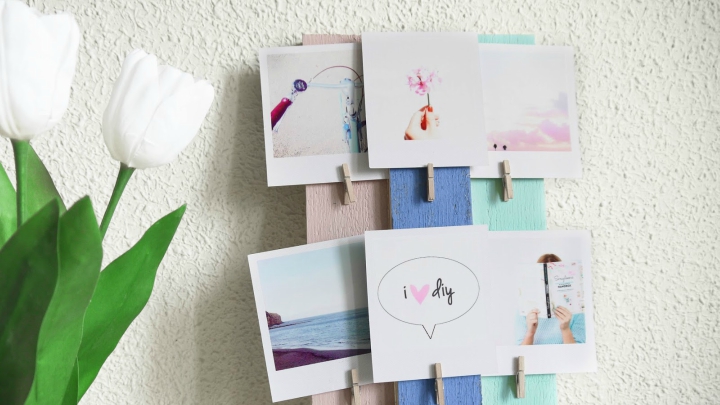
A mood board is a board where you can put all that inspires and motivates, from personal photographs to ideas for a work project or memories as concert tickets, for example. It is very decorative and functional, allowing you to customize your office or any room where you decide to place. Each mood board is unique because it will place everything that you like and you want to always be in sight.
Today I want to show you two crafts to make your own mood board. It is two ideas designed to hang your photos, clippings, inspirational phrases and anything you want to have in your particular corner. Would you like to design your board and decorate with it your area of study or work? Here you will discover how…

The materials for the first DIY
The first DIY I teach you’ve seen on the blog A Pair & A Spare and need to do:
- A network of decorative fishing (you have on Amazon, for example).
- Two sticks.
- An extra piece of rope.
- A rope of your favorite color.
- Your photos, memories, clippings or ideas that you want to hang.
- Tweezers or clips.
Your own mood board, step by step
The first thing you have to do is untangle the net and thread the top in one of the poles, passing each of the holes, and do the same with the other stick at the other end.

Strengthen structure
To prevent the network decocks by weight and slack, use the other rope to give some shape and body structure. Cut one that is about 1.5 times the length of the network and starts to tie for the top, passing by all the holes in the network. Atala at the bottom and do it on both sides with respective strong knots.
Hang the board
Now, place the colored rope at the top stick, tied at both ends, and hang your board on the wall. With a tiny tweezers or clips you can even attach photos or clippings you want to see in your daily inspiration board.
You may also like to read another article on RealOrigin: Five crafts with plastic bottles
Other DIY
Now I show you another craft to make your own mood board, in this case, the blog. In this case, you’ll need three wooden slats, a brush and paint colors, small clamps, glue and wood glue and everything you want to hang on your board.

Step by Step
The first thing you have to do is paint the slats of your favorite colors, those that best combine or contrast with the rest of the decor. Then glue the wooden pegs, leaving large enough to hang your memories and to see them well without bunching gap. You can glue them so you to hold your photos or clippings from below and also from above, as you prefer. Finally, connects the slats with special wood glue.
To give you a little movement you can make one of them stand out over others sticking a rod back to this central bar remains something ahead. Once the paint and glue is dry, put on your creation plays photos, clippings, memories or whatever inspires you.


