I love the stars in the decor! So today, I want to teach you two tutorials with which you will be able to use them in a very special way. The first of them seems to me consists in creating a constellation in the wall. With the second, we are going to learn how to make some pretty hanging paper stars, which can be very cute at Christmas or decorating any corner at any time of the year. Stars are always welcome at home. Let’s see how you can make these two simple crafts.

DIY constellation for the wall
I liked this manual very much. I’ve seen it on the a blog and it’s about designing an incredible constellation of stars on the wall of your baby’s living room, office or bedroom. I love it anywhere, so you’ll decide the favorite location in your home.
How to design your constellation
To make it only you will need stickers and a fine black thread. The first thing we will do will be to mark the shape of the constellation with tape of bodybuilder so that it points you a little the way. If you want, to make it faster, you can go by sticking the stars directly and adding the thread that joins them. Make sure the stickers you use do not damage your wall.

The pattern to follow
The shape of the constellation you choose. Look for a real Internet or invent the design that you like, and why not? This will adapt completely to the space you have available. You can insert star stickers with other rounds or even use a triangle of washi tape to hold the thread more securely. There is no established pattern, you just have to dream of the stars and bring them home.
You may also like to read: DIY: Make Your Own Luminous Star
Paper stars craft
Now we are going to make other very nice stars, in this case, paper. The DIY is from the blog, where you will find the printable templates with which to make these hanging stars so cool.
The materials you will need …
- Paper to print the stars, two leaves per star. Choose the color or pattern you like most, with your favorite combinations.
- Scissors.
- Glue.
- Puncture for drilling.
- Rope of some color that contrasts with that of the star.
Step by Step


The first thing is to print the stars with the template that you will find in this blog. Then cut the five pieces of the star. Make a small incision at the bottom to separate the fins. Then bend along all the dotted lines. Keep the left side of the piece bent. Using the punch make small holes following the circles that also appear in the template, and repeat on the right side. There will be four sets of holes. Stars made with printed paper will not have to be pierced if you do not want to …
Then unfold the side of the star and fold so that all the dotted lines are inward (in the case of unprinted stars).
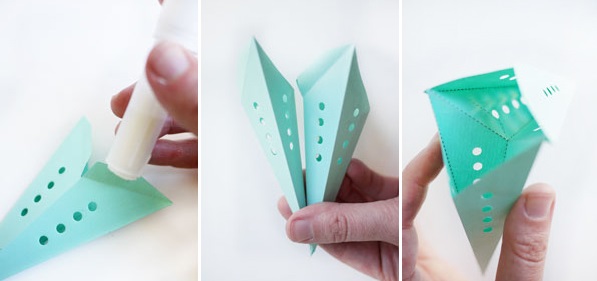
How to explain the final stages of assembly of your star may be a little complicated I’ll leave you with some pictures that illustrate the whole process, and thus you will be much easier to understand. As you will see, it is about making folds and gluing the different parts of the star so that it acquires volume and you can hang it wherever you like. It will look great on Christmas, on the tree or on a wall, although as I said before if you like it you can put it right where you want.
You may also like this site.


